Well Wal-Mart must've figured us out because it seems that they are not stocking very much (if any) of their $38 buckets. So this time we bought a $42 dollar bucket of "Country White" instead of the $38 "White". So what, it's a primer coat right? But when we got it up on the walls, it kind of looked nice with all of the yellow tile in the room, so we thought we were just going to put another coat of the Country White up and call it done. But then I had to go and get fancy and paint the trim and cabinets white, and then even fancier and paint the trim around the mirrors a nice soft grey. So the Country White no longer kind of looked nice, it looked sad and pathetic (I would even go as far to say it looked like some really cheap off white Wal-Mart color). So we needed a new paint color...
No problem. I just mixed some of the soft grey (a mistint form ACE) with the country white from Wal-Mart and a touch of white and voila - Anne #6. There is absolutely nothing remarkable about this color. It just looks really soft and nice and was free. We have a full scale redo on the list for this room, so I saw no reason to obsess about paint since we were just doing mini makeover and wanted something fresher and lighter that didn't involve vertical striped wallpaper.
Last chance to see the wallpaper


We lived that nightmare for 8 and 1/2 months people! Gah.
Here is a little teaser of the after
 |
Remember I took this picture and then dropped the camera? So this is the only picture I have of the walls until I can clean up the bathroom a bit. |
Anyhoo, on to the lighting...
We had the hollywood vanity lights (which were wallpapered, natch) that we hated. We took them down and tried to spray paint them so they would blend into and/or compliment the wall. But, we didn't strip all the glue residue off of them first and it looked horrendous. So, I spent ONE HOUR scrubbing the glue residue off of the lights and it wasn't until 59 MINUTES into that hour that I had the brilliant idea of covering the face plate portion of the light that was previously wallpapered, and then spray painted, and then scrubbed clean - with fabric. Therefore I spent ONE HOUR scrubbing something that I was going to turn around and RECOVER with fabric. Waste. Of. Time.
Moving on....
We decided on burlap because it's cheap and easy. Here's how I covered the lights. Which, by the way, only took about 20 MINUTES for all 3 lights.
 |
The naked light, the cover was being scrubbed clean at that point, I believe :) Also, notice the wall paint and mirror trim. It's different! Also, notice the clutter in the mirror. |
 |
Here is how easy this was. I bought the burlap (this took the longest) I cut the burlap to size. Then, I used spray adhesive to stick it to the faceplate. Then I cut out the circles so the lightbulbs would fit through. Done. |
 |
AFTER: Not earth-shattering, but better. |
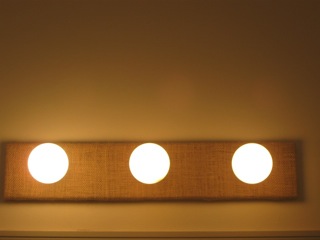 |
AFTER: Because I know that you wanted to know what the light looks like when it's turned on... |
The entire project cost $4.50 for the paint and burlap. Oh, and an hour and 20 minutes of my time not counting the trip to the store to purchase the burlap.
I figure this is way better than buying 3 cheap, temporary vanity lights that we'd hate and kick ourselves daily for spending the money. Mission accomplished.
Next up, before and afters...
No comments:
Post a Comment