But aside from Bowl Week we need to own up to some more of the blame for the delay. That's what today is all about folks, the extras. And trust me they were worth it in the end. And amazingly they were practically free. I'll do a rundown of costs later, but I think that the total cost of our extra somethin-somethin's was less than $10. That's what I'm talkin' about!
The vanity
You may recall that we talked about painting the vanity something kicky and vibrant for the kids since it is their bathroom and they are kids. Truth is, they were less than enthused about participating in any of the design related decisions - something about being on Christmas break, and the fact that they are boys who don't care about what colors are in the bathroom - whatevs, I care.
But since the project was dragging on longer than anticipated (I was still holding out that we could get the family room painted during the break), I'd decided to skip the vanity refresh and maybe just strip the moulding off the medicine cabinet door and paint the cabinet the wall color. What I'd forgot to do was say that out loud so others - I'm looking at you John - would know I was jettisoning that project. So imagine my surprise halfway through the project when I think John is patching the walls and I find out that he has enlisted Sam to pry the dated moulding off the front of the vanity doors. Oops. My bad.
Now here are two things that suck about this new development.
1. When you factor in the sanding, wood filling, more sanding and other prep for the vanity to be painted - we've just added a project that will take at least 2 days to finish. And I have zero ideas about what color to paint it as well.
2. We don't have enough of the wall paint left to paint the medicine cabinet door. See this post.
So with no other options we took a deep breath and moved forward. I took over for Sam and carefully removed the trim from the rest of the doors (Sam, I love you - however - home improvement tasks that require a more delicate hand are not your strong suit) and John sanded the front of the vanity and the doors.
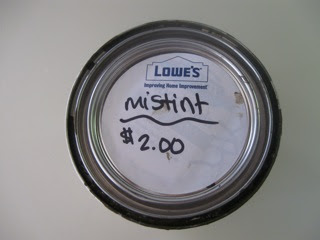
Here is where it gets awesome in one word - mistints. My favorite place to go at Lowe's and the Depot. I've already mentioned my anxiety over choosing paint colors. I figure, why not clean up someone else's sloppy seconds and save some bank. I'll save some time and just post this:

And this:
 |
| Gah, I need some photog skills |
And, most importantly, this:
My new favorite thing. I. Love. It. I apologize for my crap camera skills (or possibly crap camera?) but the vanity is beautiful. We left some of the wood grain showing, thinking that we could always add another coat or two of this miracle product if we decided we wanted a more "painted cabinet" look, but for now it looks fantastic.
Last thing about the vanity. We had a couple of doors that weren't really coming around from the trim removal process, so we decided to leave a more open cabinet look for towels and other stuff you can leave out in the open in a bathroom. But the insides of the cabinets were made of less desirable wood and need something. Nothing $.50 can of a mistinted tester pot couldn't fix.
Another $.50 can of tester paint enabled me to paint the medicine door cabinet a color nearly identical to the tile on the countertop and in the shower. So let's give a big thanks to a random stranger for hating their tester pot of paint that matches my basement bathroom tile!!
Behold:
 |
| AFTER: So it stands out from the wall, but matches (close enough anyway) the countertop |
 |
| BEFORE: So you don't have to scroll up again :) |
 |
| Ahh, what 50 cents can do |
So far we've spent $3 on mistints that somehow tie my entire space together. Please tell me how I can possibly resist the mistint section from now on? What other fabulous paint choice mistakes of others are waiting for me to rescue them??
On to what is the most awesome thing about the whole bathroom. The wall behind the toilet you say? Yes please.
The wall behind the toilet
Quick backstory, when I removed the wallpaper in November I noticed the bulkhead above the toilet cove was papered over twice. Weird. Well when I got it off of there I noticed that someone had tried to hide some water damage with another layer of wallpaper. Not cool, not cool at all.
All that was accomplished with the extra layer of paper was extra time removing the paper (they used Elmer's glue to stick it to the wall - also not cool) and because I think they put it up there before the wall completely dried (or it was the combo of the moisture rich environment of a bathroom mixed with the moisture content of Elmer's) some bits of mold/mildew were evident. Crap. I scrubbed it off and let it dry for a month or so, and no new mold/mildew reappeared so I decree we are in the clear. But the wall looks like shit. The original plan was to cover it up with a new piece of sheetrock and move on. But I had a better idea...
A Wood Plank Wall, another rescue!!!
Over 10 years ago we had taken down a very dangerous storage cabinet that was hanging from the ceiling of the garage at the old house. In the last ten years the wood has experienced so many indignities.
1. It sad abandoned on the floor of our garage for about 5 years.
2. Then it was moved to a storage garage and languished on that floor for about 4 years.
3. Then it was moved to a friends house and an attempt was made to sand it down and make something cool with it. I don't know what happened there, but next thing I knew it was back at our house now resting outdoors behind the garage.
Then we moved. And left it behind. All that patience rewarded with desertion. Poor wood planks.

Funny story: We totally believed that the wood was here at the new house. When we got the idea for the wood wall, John went looking for the wood and couldn't find it anywhere. Then we drove by the old house and peeked over the back fence and saw the sad pile right where we left it. Ugh. So, one awkward email to the new owner later (On Christmas Eve, no less) we were granted permission to go and get the pile that we had carelessly left behind. How embarrassing...
But here is what we did right when we got home.
 |
| horizontal |
 |
| vertical |
We decided on vertical because the space wasn't that wide and we thought that it would look really chopped up the other way. John spent hours sanding the planks to get rid of 10 years of neglect and wear and tear, and they came out good as new. We cut them in 2, 3 and 4 foot sections and started assembling the pieces so the best planks were highlighted and the not so good ones were behind the toilet. Then I forgot to take pictures of that process :(
We put a vapor barrier on the wall and started attaching the planks with the nail gun. So, after about 4 hours of prep (finding the wood, going and getting the wood, sanding the wood, etc...) in 5 minutes we had awesomeness. Behold....
 |
| See what I mean? Fantastic. |
 |
| The bulkhead that once was covered with two layers of wallpaper and trace amounts of mold/mildew is now lovely. |
 |
| Close up of awesome. |
A couple of quick notes.
The wall looked really thirsty, so we applied just one coat of poly to the wall and it came out looking like this. I don't know what we did to deserve this reward from the pile of sad, neglected, deserted wood - but I'll take this anyday.
Also, as John started attaching the pieces and about 1/3 of the way through we remembered that bathroom = moisture so we needed to leave a little space for the wood to expand (that's what she said).
Next up, before and afters. Yay!!
No comments:
Post a Comment