Monday, March 19, 2012

Spring Break! Woo!!

We were given a gift this week.  Wonderful, fantastic, magnificent weather.  Our original plan was to settle on a master bedroom color, paint and start decorating the room.  Instead we knocked down an exterior fence, dug up some 30 year old railroad ties and built a new retaining wall.  Whew.

Here is the story in pictures:


What it looked like last fall


Contemplation.

This whole project was spearheaded by the kids' refusal
*cough William cough*
to eat a yummy pizza that we had ordered for Spring Break!  Woo!! dinner.

John was a little cheesed off, so he went outside and kicked the fence down.


I kid.

He really wasn't that mad.  But it took less than a minute (48 seconds) to kick the fence down.

Apparently they didn't pour concrete foundations for the posts.

Our lucky day I suppose....


Phase one.  Which was all we were going to do this spring.

We decided to build a new! improved!! retaining wall and take up the
30 year old railroad ties which were rotting away anyway.

We weren't going to round the corner this spring,
we thought we could livewith it this summer and possibly do it this fall.

But then the weather was perfect for outdoor projects, so...


... we rounded the corner and decided to knock this section out as well.  


Not even kidding, this photo is nearly the exact angle as the one above.
That's what the wall above looked like this last fall


Here is a closeup of the rotting railroad ties.  The rot
did not make them any easier to remove.

Not. One. Bit.


Only 2 more levels of railroad ties to go!!


Now, I'll skip to the good part.  Because how many pictures of John, Sam or I swinging various implements (sledgehammers, chainsaws and axes OH MY!!) to hack away at some railroad ties can you look at?  Seriously, those were AWFUL.  I suppose they were properly installed with 3 foot long spikes holding them steady.  But so many of them were rotted with weeds growing through them we just bit the bullet and moved forward.  

But seriously, it sucked removing them.  I can not stress enough how bad it sucked.  Trust me, it did.

Moving on...


Yay!! Almost done :)
And now, the big reveal...

BEFORE

Seriously.  This is the same spot.  Seriously.


AFTER

Ahh.  All done :)

We can't plant anything for another 5 or 6 weeks, but OMG it's awesome.

No more weeds or rotten railroad ties.


And another angle..

 BEFORE

annnnnddddd....


AFTER!!!

Here is the view from the deck.
The veg garden goes on the left, and cutting garden goes on the right.

We are thinking about building a nice fence to give us some privacy back there,
but will definitely not get to that anytime soon.

We're tired.  And happy.


So there you have Retaining Wall Adventures 2012.  The first installment.


Wednesday, March 7, 2012

The end of an era

Wallpaper.  It's been our nightmare from the beginning.  But no longer friends...

It's gone.  6 months and a couple of weeks have gone by since we moved and the day has come.  There is no more wallpaper in our house.  None.  I just have to strip the backing paper off the walls in the master bath and we will be an official wallpaper-free home.  It feels good.  So good.  Here is a run down and look back at the madness:

Ahh, the hallway...


another angle of the hallway paper


the basement hall and bathroom


The kitchen


What you don't really see in the photo above are the disparate patterns:

There is a vertical stripe paper in the kitchen.
Tiles with X pattern on the backsplash.
Window inserts with an X pattern.
Whatever the hell is going on with the hallway paper.
And judging by the amount of water rings on top of the cabinets, plants everywhere.  

I really don't understand how that could start your day off right.  But then again, I wasn't thinking about wallpaper in 1978 :)


the master bedroom


the master bath


the powder room
And... the laundry.  More pattern madness!!


As you can see, we've been busy.  The former owner's family were kind enough to leave behind the notebook that was kept when the building/design of the house originally took place.  I've looked back it it several times and can only imagine the agonizing decisions that were made as to which wallpaper to choose, or which doorknobs, etc...   But really, look above.  Who in decorator hell advised this woman to put those 2 patterns in adjacent spaces, WHO???  

No matter, it's gone now.  But I will share from the notebook the sheer volume of wallpaper we've removed.

All rolls are single rolls, apparently that's how they were sold in 1978...

HALLWAY:  33 rolls
KITCHEN:  8 rolls
MASTER BEDROOM:  24 rolls
MASTER BATH:  12 rolls
LAUNDRY:  10 rolls
POWDER ROOM:  9 rolls
BASEMENT:  25 rolls

For those of you keeping score, that's 121 rolls of wallpaper (or 60 in today's double roll world).

What's next for us?  Paint, paint and more paint.

I'm still not 100% happy with the hallway color and since that was such a huge job, I've become a tad scared of making bold color decisions.  That's why our kitchen isn't painted yet.  Or why we painted the basement hallway a nice soft grey (I'll take some after photos and post soon).

The amount of wall space is still very shocking to me and I hate to waste time and money on a bad color decision.  So we've been painting everything very neutral.  Like primer white neutral.  It works for now.  Hopefully once we get used to living in a pattern-free home for awhile, then our brains can relax and get more inspired with color.

Next project unknown.  Possibles include:

painting the fiesta cantina
painting our master bedroom and bath
painting the kitchen
painting Will's room
or maybe, installing the gallery wall and lights in the hallway :)

TTFN


Wednesday, February 22, 2012

Q*Bert

We actually have a couple of different areas in our living room that are ripe for an accent or feature wall.  I mentioned the wall between the living room and kitchen here, but the wall our television goes on is another stand alone wall that we could do something fun with.

Here it is on moving day:

There's that pink.

We painted the hideous pink backgrounds about a week after moving, but our 46" television wouldn't fit on the counter without removing some of the vertical shelving pieces.  So down the one on the right went.  Our TV fit pretty well in the large opening, but we had our components on the counter and it looked pretty low rent.  

After the success of the wood wall in the basement bathroom, we thought we'd try it again.  But after looking around on Pinterest for awhile, I found something much, much cooler.

Prepare yourselves for the Q*Bert Wall...

But first, the backstory.

IN PROGRESS:  We've taken the shelves out and are getting ready
to start!  I just included this for the Vera photo bomb :)
IN PROGRESS:  We let Will draw something on the wall for a time
capsule.  He chose Plex from Yo Gabba Gabba.  He's 10.

To create the all mighty Q*Bert, we bought 4 sheets of luan plywood for $9 a sheet and cut 2 of them into diamonds.  Then we laid them out in a cubish pattern atop the other 2 sheets and glued it all together.  Here it is all laid out and ready to install.


IN PROGRESS:  We didn't think this step through.   We assembled it in the basement
and then tried to carry it back upstairs - it was pretty fragile.
We lost a few diamonds in the transfer.
But we just glued them right back on.  NBD.
So pretty cool right?  We left a few diamonds off so we could screw it directly into the wall.  Then we glued the missing diamonds back on and put a coat of poly on it.

GETTING CLOSER:  How cool is this??

I forgot to mention a few prep tasks that were necessary before we could attach this baby to the wall.  John had to move the power and cable outlets up on the wall so we could mount the TV to the wall on a bracket and not see the cords.  He also needed to build a couple of shelves to put inside the firewood storage area to hold the DVR and Blu-Ray player.  

Once the power/cable stuff was taken care of we were ready to attach the bracket and hang the TV.  I'll save you the drama of having to run out and buy little things that allowed the cords to make turns (?) and the very funny (now) incident of getting the TV hung and realizing that we didn't plug it in.  That was fun.  But here it is hung, plugged in, and ready to go.

AFTER:  Isn't he handsome?  I like how you can see different patterns
at different times of the day.  We're not sure if we are going to put
anything else on the wall.  We don't want to hide too much of the pattern.

AFTER:  Here is a side view so you can see the cool pattern from a different
angle.  And also so you can see our cool IKEA Maskros light in the stairwell.

So there you have it.  Oh, wait.  The cabinets!  We hated the way the doors were hung unevenly, it drove me crazy on a daily basis.  Since we needed to take the doors off to rehang them, we decided to modernize the 80's oak with an ebony stain.  I used my miracle product (see below) in Onyx.   John reattached the doors at the proper height and we're in business.


We'll decide after living with the wall (and possibly getting a different TV - we're seeing dark spots...) if we are going to build shelves.  I'm thinking not, but I'm not shutting that door yet.  But for now we'll just enjoy the view :)


Tuesday, February 21, 2012

Dreaming of Spring...

So when we looked at the house in late May we noticed the landscaping needed some love in a few places.

We have railroad ties that are falling apart, heaving brick patios and a deck that is soft and spongy in more than a few places.  We smiled and said "no big deal, we can dig this patio up and reset it" or "I know I can get some of my friends over here to help replace this deck" and "these railroad ties aren't in that bad of shape".

Then we took another look in June when we decided to buy.  "Hmmm, some of these weeds seem a bit large" and "that patio is going to need some attention stat".  Then later in June, after we bought the place but before we closed, we came by for some measurements and noticed that the weeds were growing unabated, but really couldn't do anything since we didn't own the place.  Most obvious, the north side of the house had a nice landscaped walkway that leads you from the front of the house to the back yard that seemed to be disappearing.

Fast forward to August 19, closing day.  We were proudly showing everyone around and then - CLUNK - outside.  We were fortunate enough that the previous owners paid for a lawn service and continued to water the lawn, so the lawn was nice and green, but anything that wasn't lawn - weeds.  Weeds taller than 6 feet.   So many weeds that you didn't even know there was a walkway on the north side.  You couldn't tell there were tiered planting beds in the backyard.  Vines growing like crazy up the side of the house.  Sigh.


Trust me,  this is the backyard


Hello heaving patio with weeds included!!
We spent most evenings in September pulling weeds on the north side of the house to restore some sense of livability.  Here is what it looked like before...

Why, Mr. North side of the house - where is
your lovely walking path??

And, here it is today.

There's the walking path

Ahh, much better.  This is the easy side of the house.  All we have to do is not let the weeds grow and it'll look like this.  Now for the rest of the exterior.  Sigh.

Those are railroad ties that are falling apart.  And the
only way to walk from the deck into the backyard

See the patio?  I don't think it should be
draining toward the house, do you??

The camera is level, it's the fence that's not :(

This is going to have to wait, since we are the only
ones who would use these "stairs" that go
 from the front entry to the backyard

This is the south side of the house.  It also drains the wrong way - toward the house


Now we've got big plans.  Sadly, we've also vastly underestimated the amount of effort and money that exterior projects eat up.  But we've budgeted and planned for the immediate needs, so the agenda for summer 2012 is as follows...

1.  Replace deck.  Fortunately, the framing is solid as a rock, the 30 year old boards are not.  Hopefully we'll get by with only replacing the floor and rails, and trellis...

2.  Dig up and reset heaving patio.  We were going to build a lower tier to the deck there, but seriously - how many square feet of deck does one family need?  So for now, we'll reset what we already have and it will be just fine.  I promise.

3.  Regrade south side of house.  We suspected it was a problem, and now the snow has melted, we know it is a problem (it looks like a sweet little lake out there - 2 feet from the house).  Hopefully we'll find some free fill dirt on craigslist.  I'm also planning on building some planters underneath the windows to the boys' rooms for privacy and some pretty.  We'll see how that goes.

4.  If the budget allows, we'll also have the ash tree removed before the ash borer comes along and does it for us.  I'd prefer to have professionals remove it so it doesn't crash through my living room ceiling.  I'm scared to call for estimates though.  It's not going to end well for the tree or our checkbook I'm afraid.  We'll see if the tree guys feel sorry enough for us and give us a good deal on removing the pine tree as well.  It's got the wilt and isn't looking too good these days.  Poor fella.

Since this will be our first spring around here, I'm hoping that lots and lots of pretty flowers come up this spring to help us through this.  We'll need all the pretty we can get for motivation!!


Tuesday, January 31, 2012

FAIL.

Well, I got real cocky about my paint mixing skills and it backfired.  Sigh.

We have a perfect accent wall situation going on in the living room, so when we painted the room soon after moving in (nothing to update, pretty much the same color, but fresher) we left that wall because I was going to make it awesome with some fun paint color.

BEFORE:  ahh, the pink carpet.  I don't miss you.
But see, a perfect accent wall!
So here we are 5 months later and ready to paint! Anne #4 in T minus 10 and counting...

I had thought a nice smokey plum color would tie in the bricks and add some drama to that wall.  So I mixed some mistints together and went to town.

Behold...
This is after the one, and only, coat.  And yes,
Frankenmantle is still living with us.
No freaking way.

I didn't even give it a second coat chance.  It was just wrong with a capital W.

I didn't even give anyone else a chance to offer their opinion (I sent a picture to John at work, and he was very kind and diplomatic, but I knew it was no good) So back to the basement.  I'd had enough drama for today, so I decided a nice, calm, greenish-gold was in order.

I chickened out and just went with a rich golden color (not too much green) that blends in and doesn't scream "Look at me!  I'm trying really hard to look dramatic, but instead look ridiculous!!"


AFTER:  Anne #5 is so much better

ADDED BONUS!  Sam's woodcuts look amazing with
this color on the wall :)

It's really not that big of a deal, the wall takes about 1/2 hour to paint.  And it doesn't take that much paint either.  So I can just paint it anytime I feel like mixing up something new or find something fabulous in the mistint section.  But I'm sticking with this for now.  And never, ever, ever considering purple/plum again....


Friday, January 20, 2012

Basement bathroom, part four - THE "WOULDN'T THAT BE COOL" PROJECTS

I'll admit it.  The bathroom took waaaay longer than we thought.  Some of that wasn't our fault *cough*  backsplash tile *cough*  Some of it was *cough* Bowl Week *cough*...

But aside from Bowl Week we need to own up to some more of the blame for the delay.  That's what today is all about folks, the extras.  And trust me they were worth it in the end.  And amazingly they were practically free.  I'll do a rundown of costs later, but I think that the total cost of our extra somethin-somethin's was less than $10.  That's what I'm talkin' about!


The vanity
You may recall that we talked about painting the vanity something kicky and vibrant for the kids since it is their bathroom and they are kids.  Truth is, they were less than enthused about participating in any of the design related decisions - something about being on Christmas break, and the fact that they are boys who don't care about what colors are in the bathroom - whatevs, I care.

But since the project was dragging on longer than anticipated (I was still holding out that we could get the family room painted during the break), I'd decided to skip the vanity refresh and maybe just strip the moulding off the medicine cabinet door and paint the cabinet the wall color.  What I'd forgot to do was say that out loud so others - I'm looking at you John - would know I was jettisoning that project.  So imagine my surprise halfway through the project when I think John is patching the walls and I find out that he has enlisted Sam to pry the dated moulding off the front of the vanity doors.  Oops.  My bad.


Now here are two things that suck about this new development.  

1. When you factor in the sanding, wood filling, more sanding and other prep for the vanity to be painted - we've just added a project that will take at least 2 days to finish.  And I have zero ideas about what color to paint it as well.

2.  We don't have enough of the wall paint left to paint the medicine cabinet door.  See this post.

So with no other options we took a deep breath and moved forward.  I took over for Sam and carefully removed the trim from the rest of the doors (Sam, I love you - however - home improvement tasks that require a more delicate hand are not your strong suit) and John sanded the front of the vanity and the doors.  

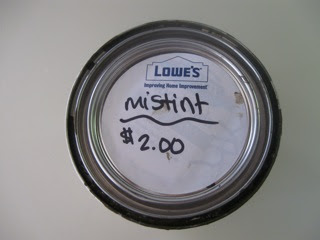
Here is where it gets awesome in one word - mistints.  My favorite place to go at Lowe's and the Depot.  I've already mentioned my anxiety over choosing paint colors.  I figure, why not clean up someone else's sloppy seconds and save some bank.  I'll save some time and just post this:


And this:


Gah, I need some photog skills


And, most importantly, this:


My new favorite thing.  I. Love. It.  I apologize for my crap camera skills (or possibly crap camera?) but the vanity is beautiful.  We left some of the wood grain showing, thinking that we could always add another coat or two of this miracle product if we decided we wanted a more "painted cabinet" look, but for now it looks fantastic.  

Last thing about the vanity.  We had a couple of doors that weren't really coming around from the trim removal process, so we decided to leave a more open cabinet look for towels and other stuff you can leave out in the open in a bathroom.  But the insides of the cabinets were made of less desirable wood and need something.  Nothing $.50 can of a mistinted tester pot couldn't fix. 

Another $.50 can of tester paint enabled me to paint the medicine door cabinet a color nearly identical to the tile on the countertop and in the shower.  So let's give a big thanks to a random stranger for hating their tester pot of paint that matches my basement bathroom tile!! 

Behold:


AFTER:  So it stands out from the wall, but matches
(close enough anyway) the countertop 
BEFORE:  So you don't have to scroll up again :)
Ahh, what 50 cents can do


So far we've spent $3 on mistints that somehow tie my entire space together.  Please tell me how I can possibly resist the mistint section from now on?  What other fabulous paint choice mistakes of others are waiting for me to rescue them??

On to what is the most awesome thing about the whole bathroom.  The wall behind the toilet you say?  Yes please.

The wall behind the toilet
Quick backstory, when I removed the wallpaper in November I noticed the bulkhead above the toilet cove was papered over twice.  Weird.  Well when I got it off of there I noticed that someone had tried to hide some water damage with another layer of wallpaper.  Not cool, not cool at all.

All that was accomplished with the extra layer of paper was extra time removing the paper (they used Elmer's glue to stick it to the wall - also not cool) and because I think they put it up there before the wall completely dried (or it was the combo of the moisture rich environment of a bathroom mixed with the moisture content of Elmer's) some bits of mold/mildew were evident.  Crap.  I scrubbed it off and let it dry for a month or so, and no new mold/mildew reappeared so I decree we are in the clear.  But the wall looks like shit.  The original plan was to cover it up with a new piece of sheetrock and move on.  But I had a better idea...

A Wood Plank Wall, another rescue!!!
Over 10 years ago we had taken down a very dangerous storage cabinet that was hanging from the ceiling of the garage at the old house.  In the last ten years the wood has experienced so many indignities.

1.  It sad abandoned on the floor of our garage for about 5 years.

2.  Then it was moved to a storage garage and languished on that floor for about 4 years.

3.  Then it was moved to a friends house and an attempt was made to sand it down and make something cool with it.  I don't know what happened there, but next thing I knew it was back at our house now resting outdoors behind the garage.

Then we moved.  And left it behind.  All that patience rewarded with desertion.  Poor wood planks.


Funny story:  We totally believed that the wood was here at the new house.  When we got the idea for the wood wall, John went looking for the wood and couldn't find it anywhere. Then we drove by the old house and peeked over the back fence and saw the sad pile right where we left it.  Ugh.  So, one awkward email to the new owner later (On Christmas Eve, no less) we were granted permission to go and get the pile that we had carelessly left behind.  How embarrassing...

But here is what we did right when we got home.

horizontal

vertical
We decided on vertical because the space wasn't that wide and we thought that it would look really chopped up the other way.  John spent hours sanding the planks to get rid of 10 years of neglect and wear and tear, and they came out good as new.  We cut them in 2, 3 and 4 foot sections and started assembling the pieces so the best planks were highlighted and the not so good ones were behind the toilet.  Then I forgot to take pictures of that process :(

We put a vapor barrier on the wall and started attaching the planks with the nail gun.  So, after about 4 hours of prep (finding the wood, going and getting the wood, sanding the wood, etc...) in 5 minutes we had awesomeness.  Behold....


See what I mean?  Fantastic.


The bulkhead that once was covered with
two layers of wallpaper and trace amounts
of mold/mildew is now lovely.

Close up of awesome.
A couple of quick notes.

The wall looked really thirsty, so we applied just one coat of poly to the wall and it came out looking like this.  I don't know what we did to deserve this reward from the pile of sad, neglected, deserted wood - but I'll take this anyday.

 Also, as John started attaching the pieces and about 1/3 of the way through we remembered that bathroom = moisture so we needed to leave a little space for the wood to expand (that's what she said). 

Next up, before and afters.  Yay!! 


Wednesday, January 18, 2012

Basement bathroom, part three - THE "LITTLE THINGS" TAKE FOR.EV.ER.

So, where did we leave off?  Oh yeah, the tile was done.  Ahhhh.  Home stretch, right?  buddy??

Not so fast I say.  We still have lots of other things, the "little things" that get added on here and there while you are working.  You know, the "wouldn't it be cool if we did _______"  or the "oh crap, now we need to do this" type of stuff.  This list is the "oh crap" variety of little things.

Here is an incomplete list because I can't remember all of them.

1.  Paint ceiling in the shower stall with mildew resistant paint - it was looking a tad dingy.  Which in turn led to...

2.  Paint the metal ring around the recessed light in the shower stall, also looking very dingy.  Which in turn led to...

3.  Fixing the way the metal ring is attached to the ceiling (I'm sure there is a more professional way to say that, but I don't know it).  2 of the 3 screws went back in with no problem,  pesky #3.  That took about 40 minutes to fix.  Longer than the ceiling and ring painting took combined.

4.  Paint the walls.  Again, I get so bogged down looking at paint swatches and second guess myself.  To alleviate this anxiety, I just mix up my own colors.  That way if I absolutely hate it, I didn't waste $30 and can always paint over it.  My problem with paint mixing is the AMOUNT of paint.  We barely had enough to finish.  Oops.

Paint mixing adventures sidebar....

Anne #1:  The laundry room at the old house.  A lovely aqua/turquoise color that looked amazing, happy and bright - everything you want in a basement laundry room, right?

Paint remaining?  NONE.

Anne #2:  The powder room here.  I was too lazy to go to out and get paint, so I mixed it up here and it looks exactly like I wanted it to.  A nice, relaxing blue, with just a hint of green.

Paint remaining?  About 1/4 cup.

Anne #3:  The basement bathroom.  It needed to be light and not compete with the darker floor tile and tiles on the countertop.  It's a nice neutral, with just a touch of green to set off the backsplash tile and vanity.

Paint remaining?  A little more than 1/4 cup.  I'm totally getting better at this!

See what living on the edge gets you? 


Basement bathroom on the left
Powder room on the right.


Back to the list...

5.  Replacing the baseboard on the long wall.  Once we removed the tile from the hospitalesque walls around the toilet, we needed to run the baseboard all the way down that wall, and stain it to match the existing woodwork.

6.  Cutting down the baseboard that was on the long wall to fit the other places that now needed baseboard.

7.  Finding out how to bridge the gap where the former tile around the toilet met the tile surrounding the shower.  Answer:  a thick piece of moulding with rounded corners painted the wall color.

I'm sure there is an 8, 9, 10 and beyond - but you get the drift right?   All the little things (and the thinking through the problems, shopping for solutions, etc.. take much, much more time and money than you could possibly budget for.

Next, a couple of "wouldn't it be cool if we did _____" projects.  Which are awesome.